Friday, 28 August 2015

Ice Dyeing Again

     A lovely box from Maiwai Ltd in Vancouver arrived two weeks ago with several tins of powdered fabric dyes. I've been dying to try them out (no pun intended).
     I decided to experiment with three types of fabric -- all cottons but several small pieces were pre-washed in a soda ash solution, a couple were bought already prepared to be dyed and the last couple fabric samples were machine washed to remove any sizing. Safety pins were attached to the corners so I would be able to remember which fabric was which.
     The bin is from a local fishing supply store, I wanted something sturdy enough to be used outside even when the weather gets colder. I picked up a couple of dish-drying racks from the Dollar store ... a good fit but since they were light-weight plastic, once I put the ice cubes they started to buckle a bit ... the fasteners I used to help secure them, didn't work in the end. If I see some cheap wire-framed dish racks I'll pick them up.
     Some of the material I scrunched up, some I folded like a fan or in squares, others I twisted in a coil ... tried a variety of things to see what results I liked best. In the end the scrunched, fan-folded and the twisted ones were my favourites. The ones folded in a square & rectangle didn't work so well beyond a couple layers. There is some fine netting over the rack to stop the ice cubes from falling through ... should have confirmed that the clips actually held the netting in place ... some ice cubes chose to fall through the sides and not do their intended work!

A couple bags of ice followed, I put on a face mask and then  added the dye.
     I know if 3 or more colours are placed on the same area it will turn a muddy to dark brown. I tried to keep the colours relatively separate only overlapping a little to get a small mix of colour. When I did the ice dyeing workshop last month, I think the dyes we used were a little more granular than what I had ... or maybe the difference was that my dyes were newer, or maybe it was because it has been so humid out ... my dye powders seemed to clump and it was difficult to get a good spread of colour.
     The following day turned out to be rather rainy .... with the ice melted, I took everything outside & rinsed the fabric and the container with the garden hose .... and decided to let the rain do the final rinse with the fabric pieces hanging on the clothes line.
      I haven't bothered to use a 'salt wash' to secure the colours ... these fabrics will be used in art quilts and I am not planning on them being washed.
     General results: I'm not too crazy about the moss green colour ... it turned rather muddy; I do have two shades of green and may try it again with both greens.  Love the turquoise and will try that again with the 2nd shade of darker blue that came. One of the scrunched pieces in blue will make a great sky piece of fabric.  I like the fuschia colour, it kept its bright colour the best, but I don't use a lot of fuschia in my work.
     The next plan is to dye some fabric without the ice ... that hopefully will give me more intense colour. My daughter saw some dyeing ideas on Pinterest, one using tissue paper overlays on fabric; that might be interesting to experiment with as well. We shall see ...


Monday, 24 August 2015

Two shy of 1000

     By tomorrow 1000 people in 16 different countries will have looked at this site ... who knows, maybe even by the end of today. That's kind of neat! :-)

     The past week and a half has had very muggy weather ... everything sticks. The material won't glide smoothly on the sewing machine, material sticks to the rotary cutter and the cutting board, paper used for making templates wilts in my hand. It feels like I could just reach my hand up and squeeze the air and rain drops would be produced.

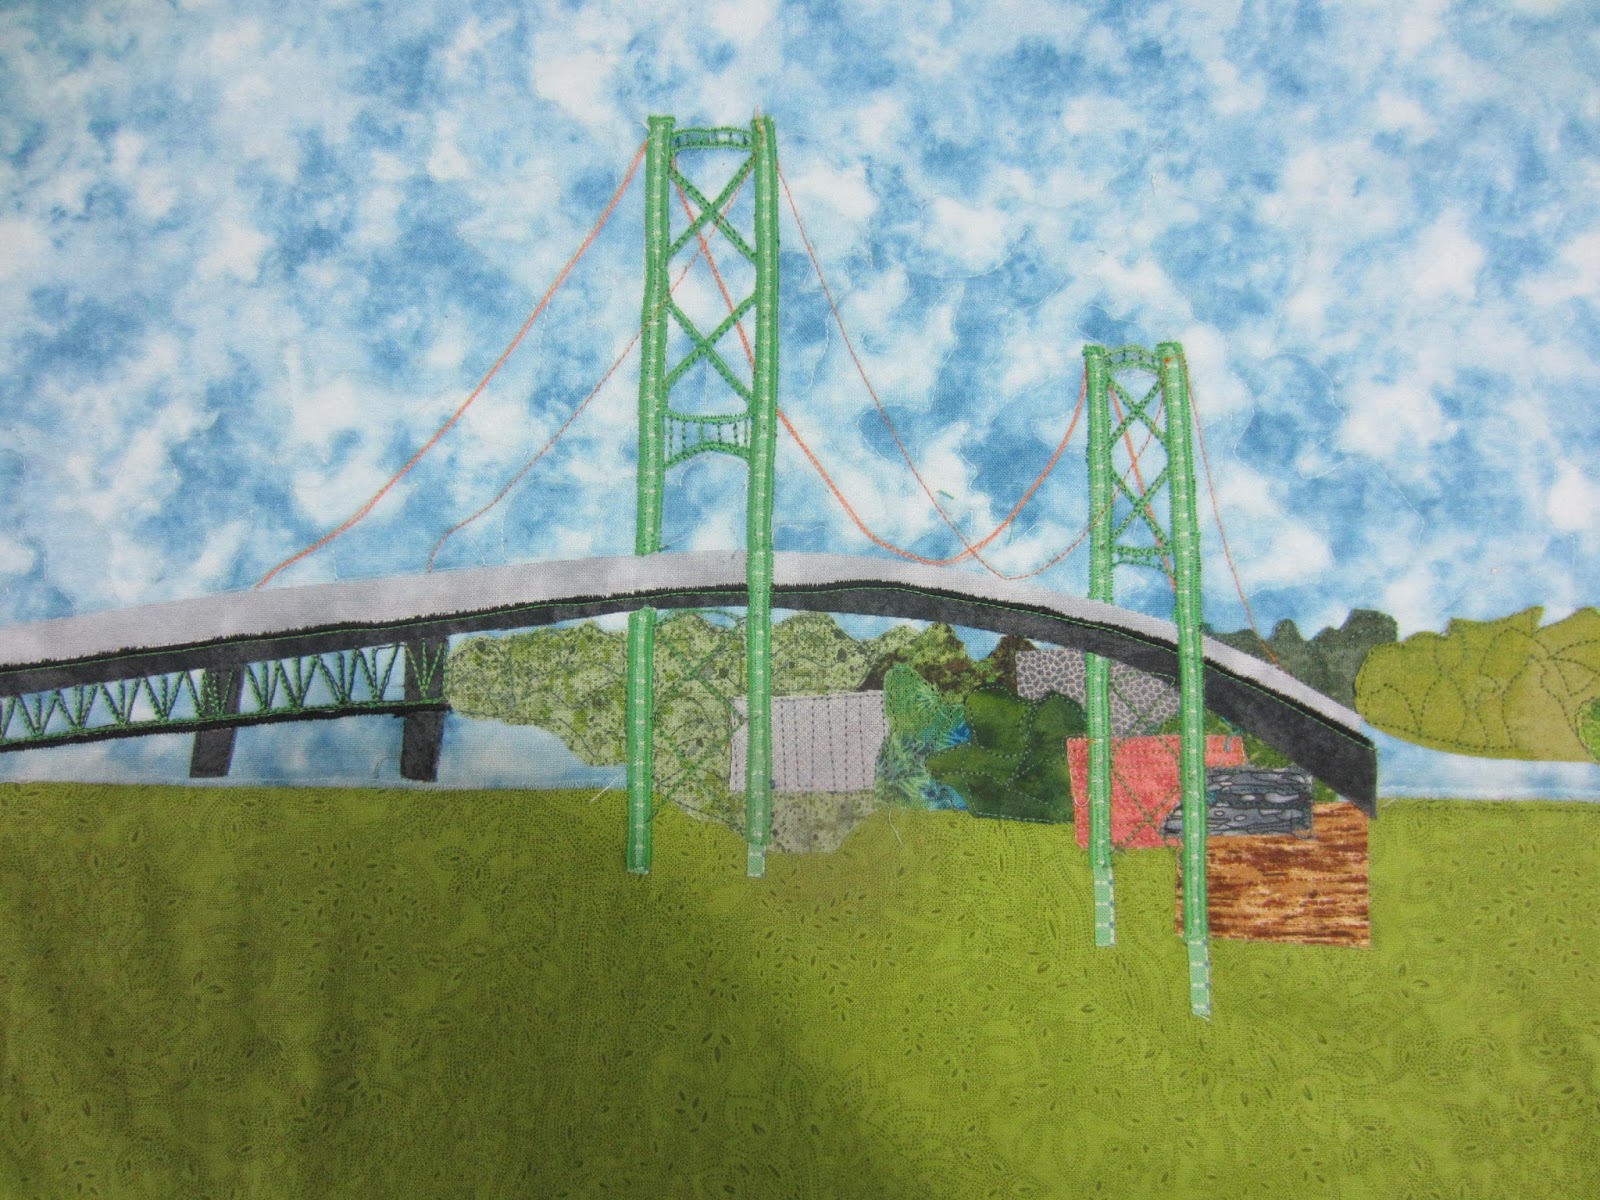
     I've added more detail to the MacKay Bridge ... the bridge itself took approximately 5 hours to complete, in small bits of time since it was too humid to sit anywhere for any length of time.
     I like the clouds/sky better in this picture than in one of the others I am working on.
Still not totally satisfied with the smoke stacks (by the way, an electrical storm on Saturday late afternoon & again early on Sunday morning managed to hit the power station & a transformer knocking out power twice for most of the city and surrounding area.) I live just to the left of those chimneys .... the night explosion scared the crap out of me!)
     Anyway, back to quilting .... I think the problem of the chimneys is the red fabric: after I satin-stitched the edges I noticed the fabric was fraying a bit ... although a perfect colour, the weave is a little loose.  I should add shading with some gray thread to the smoke stacks.
     Several of my photos of the bridge had the bow of a large ship sticking out close to the bridge footings ... I eliminated that so the buildings could be shown coming down the hill.
     My daughter came by for a 'colour consulation'.  I always like it when we pull out several pieces of fabric to use for sashing and borders and end up choosing something pretty similar. She has an Arts degree and a really good sense of colour  ... its good to know I am on the right track!

Sunday, 16 August 2015

New Rules

I've decided to add two new rules for quilting.
1. When something is working, don't stop. When the bobbin runs out, don't take a break but refill it and keep going until you finish the section you are quilting.
2. When you return after taking a break and things stop working: stop, walk away from it and come back another time. No one should spend time taking out a bird's nest or realize that you adhered the next fusible piece to the wrong section.

     I've started to work on the 3rd piece for Crossing the Harbour. It still needs more top-stitching but the background is in place and the 3 chimneys of Tuft's Cove are ready to go.

     This bridge / chimney picture is bigger than the original I did for the SAQA Atlantic Canada show, so I have been able to add more detail to the houses and apartment buildings surrounding the power station. Most of the buildings should have the same colour brick, but I wanted more contrast between them. The red sections on the chimneys look a bit wonky up close; stitching over top will solve that problem (I hope). So far, I have drawn, cut and adhered 135 pieces to the background section. I am looking forward to having this part finished so I can start on the bridge.

     The "break" that I took yesterday (after the bobbin ran out of thread) was great ... I did a mini roadtrip: off to Avonport to pick up a 'few' pieces of fabric, across country on a highway that ended up near Chester, a side-trip over to Lunenburg to visit Laurie Swim's quilt gallery (I wanted to check closer how she quilted her skies & water ... can't wait to take her workshop the end of next month) and then on to Mahone Bay 'Suttles & Seawinds' to check on fabric, quilts & clothing,  a couple stops at antique shops and finally a stop in at Sheila's Fish & Chips in Hubbards on my way home.  A worthwhile break even though today, my sewing machine decided it didn't want to cooperate.

Sunday, 2 August 2015

Crossing Harbour 2

     The Dartmouth ferry is almost done ... there is a small logo near the door/ramp that needs to be added. I am not totally happy with the sky yet, so I will let it sit for a bit while I work on the 2nd piece.

     I have not been working on this one as quickly as I first thought ... the sun is out and it is finally warm. I'd rather be outside sitting on the deck with a cool drink watching ships go by than sitting inside quilting.  At some point I need to get an estimate to get another window put in my studio space and then I can watch the harbour traffic from inside!
     The MacDonald bridge is still a work in progress: Large shrubs and trees will be added to the foreground at the base of the bridge. My photo shows the underside dark and in shadow but once I did the lower trusses in black and I was looking across at the MacKay bridge from the deck & realized that the underside is actually green (I should have remembered from the earlier bridge quilt that I did!) ... a quick car trip over to the MacDonald .... and yes, it is green too. I added lines of green along the black trusses ... hopefully it looks like shadows on green trusses.

     The next step is to add the orange cables to the far side of the bridge, add detail to the railings (grey strip area) and then the cables to the closer side. I still need to work on making the underside of the bridge on the far end a little more convincing.
     From the location I took the original photo, you cannot see the water but you can see the tops of a couple of roofs ... I am standing at the top of a hill.  I think I might take a bit of 'artist's license' and eliminate the roof tops. When I went back today to confirm the bridge colours, the nearby trees were fully in leaf and the roof tops are hardly visible. 

Thursday, 30 July 2015

I Miss Thunderstorms!

This past week has been mostly wet and cool ... hard to believe in the middle of summer, that you  need to wear a light jacket. There have been a couple of small rumbling thunderstorms that everyone here excitedly talks about .... but what I really miss about southern Ontario is a 'good afternoon intense thunderstorm' or an overnight show of lightning flashing through the dark sky followed by the long roll of thunder.  You don't get good convection air currents next to the ocean, and as much as I love to see the fingers of fog stretch up the harbour, an occasional convective thunder storm would make my day (or night).

So ... during the wet, cool days of the past week, I decided to read and then read some more. A friend mentioned the Goodreads.com site .... and I reserved a few interesting books through the local library. As would be expected, all the reservations came within 3 days.

I also tried dyeing some fabric with what I had around the house .... liquid dyes and ice are a lost cause!  The dyes coagulated on the ice and left little blobs on the fabric. Large areas of the fabric remained white ... which I guess in the long run is a good thing. Now I can reuse most of the fabric with the powdered dyes I will now order on-line.

Saturday, 18 July 2015

Halifax Harbour

     On the same theme as the bridges "Crossing Halifax", I've decided to work on "Crossing the Harbour" or maybe "Crossing Halifax Harbour". It will consists of 3 landscape quilts: the MacKay Bridge (which I've done before), the MacDonald Bridge and the Dartmouth-Halifax ferry.
     So far I have been working on the ferry.
     This is the Halifax skyline ... I realized that some buildings didn't quite follow perspective so I trimmed a couple. I am not sure how I want to quilt the sky since the day I stood at Alderney Landing to photograph the ferry coming to dock, the sky was a smooth pale blue with no wispy clouds.
     I just remembered: I meant to add the tugboat: Theodore, a "little" bright yellow tugboat with an orange hat and a big smile on the bow.  I may add him later, tied up along the wharf.
     I added the ferry today ... it needs a lot of thread-painting to give it some character. It needs an antenna or two & a flag on top. I also realized when I looked back at my photograph that there is a church steeple about mid-picture -- will add that, but I am going to leave out the large cranes that seem to be popping out of the top of a couple highrises.
The next challenge will be adding the waves to the front of the ferry and in its wake.  (Unlike the sailboat quilt, I won't be creating large waves so there is no need of extra dark water that might be mistaken for minke whales!!)
 Original photograph of the ferry "Dartmouth II" crossing Halifax Harbour.


Wednesday, 8 July 2015

Ice Cube Dyeing

     Beth Bleasdale gave a short workshop on dying fabric with ice cubes at Bonnie's store "Sew With Vision", Halifax ... we used the parking lot out behind the new store location. After soaking our fabric pieces in a soda ash solution for 20 minutes and wringing it out, we placed our fabric pieces on a rack in a plastic tray, and drowned them in ice cubes. I chose a mid-blue and a mid-green colour (can't remember the actual colour names) and lightly sprinkled the dye powder over the ice cubes.
     It looks pretty dark here ... the blue powder turned almost black.   
 Everything was left overnight to melt ... by having the fabric sit on a small rack above the bottom of the tray, it allows the ice cubes & dye to drip through and the fabric won't be sitting in a bath of all of the colours together (unless, of course, you'd prefer that.)
     On the 2nd day, we "discovered" our masterpieces!  and repeatedly rinsed them out in cool water until the water ran clear.  At home, I gave my fabric samples an extra salt-water bath to secure the colours before hanging them out to dry.
                             I love the turquoise ... didn't expect it. The picture (taken in the sun outside) doesn't do the colours justice.   
     I didn't expect the purply colour and thought that the green would have been a bit darker, but overall, I am pleased with the results.  In hindsight, instead of crumpling all 4 fabric pieces, I should have tried different methods of folding for each to see how that would impact the dye saturation ... (twisting the fabric, flat folds, circles with elastics or thread holding them in place ... kind of like tye-dying of the '70's.)
     So ... will I do this again? Most definitely! This might give me more of the variations I need in producing 'water' colours for some of the art quilts.  I have some liquid fabric dye already & will try the same methods to see the difference between liquid & powder dyes.
     Beth says she gets her powdered dyes from www.dharmatrading.com ... I've been checking out their website to consider my next purchase!! I will also need to find a source for soda ash.
     Thank you Beth & Bonnie for a chance to try something new!